Start by throwing the equipped Net into the water, then move each catch through the Cooler. Your first useful target in Net a Fish is not the rarest fish: it is a stable cash setup made from a workable Net, a filled Showcase/Pool, and upgrades aimed at the limit you hit most often.
The practical fishing sequence is catch → manage → earn → upgrade → catch again. A Net controls capacity, coverage, and the highest rarity it can catch; these are separate limits. If the Net fills quickly, capacity matters. If fish escape the covered area, width matters. If a target is above the Net's rarity ceiling, buy a stronger Net instead of only adding space.
From the dock to your first cash setup
Your first session should end with fish in the Cooler and at least one good catch placed in your personal Showcase/Pool. The Pool produces cash every second, while selling fish gives immediate cash, so using both systems is more useful than selling every catch as soon as it arrives.
After you spawn, open the fishing equipment interface and check which Net is equipped. Throw it where fish pass through the covered area, wait for the catch result, and check the Cooler. The exact values can change with the current game version, so use the upgrade panel for the live price, capacity, width, and rarity information.
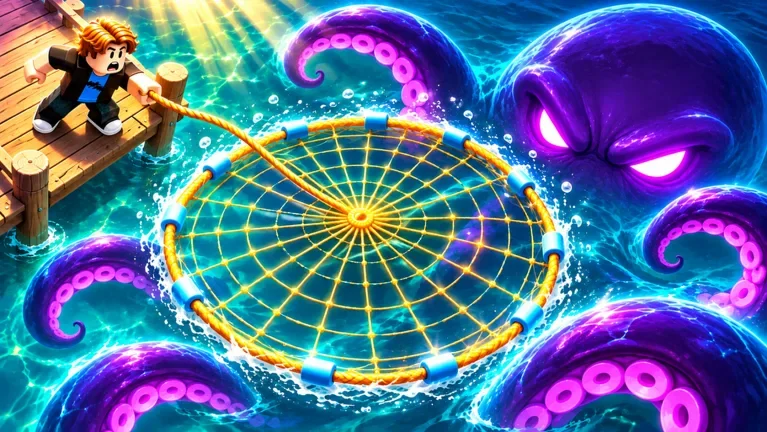
Use the first catches to identify the bottleneck. A Net that cannot hold enough fish needs capacity; one that misses fish outside its area needs width; one that cannot catch a desired rarity needs a higher Net tier. Save a strong fish for the Pool, sell safe duplicates for cash, and keep fish that you still need for the Index, Fusion, or a later Rebirth requirement.
Catch fish and build passive Pool income
These moments support the fishing loop described here: catch fish with the Net, place them in the aquarium for passive cash, and choose upgrades that address the current limit.

How a fishing trip becomes progress
Fishing is a repeatable session flow rather than a one-time sequence. An active throw creates catches, the Cooler becomes the decision point, and the result feeds three forms of progress: cash now, passive cash later, and stronger equipment for the next throw.
- Prepare: equip a Net and, when useful, a Bait effect. Bait is bought from the Bait Shop and must also be equipped or used through its control interface; buying it alone does not apply the bonus.
- Catch: throw the Net into the water and wait for fish to enter its coverage. Capacity limits how much one catch can hold, width/area affects coverage, and the rarity ceiling limits which fish can be caught.
- Review: open the Cooler and decide whether each fish is for the Pool, an immediate sale, the Index, or Fusion. Do not let Auto Sell remove fish you still want to display or combine.
- Monetize: place a high-income fish in the Showcase/Pool for cash per second, then collect that income when needed. Sell surplus fish when you need an immediate purchase.
- Reinvest: buy the upgrade that addresses the current restriction. Fishing upgrades can improve speed, Luck, Net space, or related efficiency; helper upgrades can add catches outside your own throws.
This structure gives every catch a next decision. The goal is not simply to throw more often, but to convert each Cooler load into the resource that removes your current limit.
Nets, fish, and the systems around them
These are the systems that matter most during a first fishing run:
- Net: the active capture tool. Its capacity, width/area, and Up-to Rarity determine how much it can hold, how much water it covers, and which targets it can catch. Buy it through Upgrades → Nets, following the available prerequisite chain.
- Cooler: the fish-management screen. It supports display, selling, Auto Sell, and Fusion, so inspect catches here before choosing a destination.
- Showcase/Pool: the passive-income system. Fish placed here generate cash per second; replace a low-income display fish when you obtain a better one, but do not sell your best earner just for short-term cash without a replacement.
- Bait: a temporary fishing aid from the Bait Shop. Buy and equip the relevant bait effect, then use it when the bonus helps the catch goal you are pursuing.
- Luck: a rarity-related fishing attribute. Treat it as a chance improvement, not a replacement for the Net's rarity ceiling; a Luck increase cannot make an under-tier Net catch every higher-rarity target.
- Fisherman: an automatic helper that catches fish while you handle other tasks. Upgrade it by checking its actual rod, bucket, and capacity effect rather than judging by the upgrade name alone.
- Spear Gun: a helper aimed at rarer catches. The supplied game information describes it as catching Common-and-above fish, making it important when expanding a higher-rarity collection.
- Boat: a fishing helper that adds capture ability and can be upgraded, including its Engine. Treat it as part of the fishing setup, not only as transport.
Choose Net and Fisherman upgrades
The linked moments support the upgrade guidance in this section by comparing Net capacity, width, and rarity, then showing how Fisherman equipment improves automatic catches.

Repeated fish can be more valuable in Fusion than in a sale. The supported combination rules are 10 ordinary fish for a Shiny and 8 Shiny fish for a Gold result. Check the Fusion preview before confirming so that a fish reserved for display, an Index entry, or a requirement is not consumed by mistake.
Your first complete fishing run
Follow this sequence until you have a functioning income setup and a clear next upgrade.
- Check the goal. Decide whether this run is for cash, a specific rarity, an Index entry, or a Rebirth requirement. This determines whether you should sell, display, or preserve the catch.
- Equip the best available Net. Open the equipment or Cooler interface and use the available best-equipment control when present. Confirm the Net's capacity and rarity ceiling before targeting a fish.
- Add a relevant Bait effect. Buy bait from the Bait Shop only when its cost and temporary bonus support the goal, then equip or activate it in the Bait interface.
- Throw into the fish path. Aim the Net at a populated area and wait for the catch result. If fish consistently sit outside the covered area, treat width as the problem rather than repeatedly throwing at the same spot.
- Verify the Cooler load. Open the Cooler and separate a strong fish for the Pool, duplicates for possible Fusion, and safe surplus for sale. Preserve fish tied to Index or progression requirements.
- Build passive income. Put the best suitable fish into the Showcase/Pool, then collect the generated cash when you need to fund the next purchase. Keep the top earner there instead of selling it for a small immediate gain.
- Sell only the surplus. Use the Cooler to sell fish that are not reserved for display, Fusion, the Index, or Rebirth. If Auto Sell is enabled, set its rarity threshold conservatively.
- Remove the largest bottleneck. Buy a stronger Net for a rarity limit, more capacity for full loads, more width for missed coverage, or a Fishing/helper upgrade when the active throw is no longer the limiting step.
- Repeat and check progression. Add Fisherman, Spear Gun, or Boat upgrades as cash allows. When the fish and cash requirements are met, consider Rebirth and spend the resulting Skill Points on branches such as Net, Luck, or Fortune.
The checkpoint after step 6 is the key first-session test: a fish is earning passive cash, and the Cooler still contains a deliberate reserve rather than an unexamined pile.
Upgrade priorities and recovery choices
Use this priority order, then change it when the game shows a different constraint:
- Fix rarity first when the fish you want is above the Net's Up-to Rarity.
- Fix capacity when every throw fills the Net before you can benefit from better targets.
- Fix width/area when fish are available but regularly fall outside the covered zone.
- Protect income by keeping the best suitable fish in the Pool and selling only surplus catches.
- Add automation with Fisherman, Spear Gun, or Boat after the active setup can support their costs.
- Use Fusion and Rebirth deliberately after checking which fish and cash the next progression step requires.
If you bought capacity but still cannot catch the desired rarity, recover by upgrading the Net tier; capacity and rarity are independent. If a throw misses fish, reposition first and then improve width if the problem persists. If you sold a useful duplicate, stop Auto Sell or raise its safety threshold and rebuild the set through future catches rather than spending on unrelated upgrades. If Fusion consumed a fish you needed, check the preview before the next combination and reserve Index or Pool fish in the Cooler. If cash is slow, keep the strongest available fish in the Pool, sell only extras, and use the next purchase to address the exact limit shown by your catches.
First-time Net a Fish fishing questions
Do Big Net and Auto Throw replace a higher Net tier?
No. Convenience or capacity features such as Big Net and Auto Throw can make fishing easier, but they are not the same as raising the Net's normal tier or rarity ceiling. Check the upgrade panel before paying for a feature when your actual problem is access to higher-rarity fish.
Should I upgrade the Fisherman before the Boat?
There is no universal order: compare the current cost and the specific effect shown by each upgrade. Choose the helper that addresses your active bottleneck, such as extra automatic catches, a larger bucket, or additional capture ability, rather than choosing by the helper's name alone.